Tutorial 4 - Virtual Environments


A virtual environment is a tool that helps to keep dependencies required by different projects separate by creating isolated containers for each project. Within each environment, the Python interpreter, libraries, and scripts are independent and isolated from the libraries and packages that are installed in the main Python installation.
Therefore, when we create and activate a virtual environment for a specific project, the project runs as an independent application with its own Python interpreter and its own pip for installing packages. This prevents conflicts between projects and protects the global Python installation from accidental changes.
Using separate environments ensures that updates to a library in one project do not affect others, making it easier to reproduce results and collaborate on large projects. For example, one project can use TensorFlow 1.12 while another uses TensorFlow 2.5, without compatibility issues. This way, we won’t worry whether an update to the TensorFlow library in the main system-installed Python would impact the code in all our projects.
There are several tools for managing virtual environments, including Python’s built-in venv module which has been available since Python 3.3, and also Anaconda offers a similar feature through its conda environments. Both allow to maintain separate package versions for different projects. Whenever you start a new project, you can simply create a new virtual environment to keep its dependencies isolated.
Python venv Module
The module venv is typically included in the standard Python library, and does not require to be installed.
If for some reason it is not available on Linux systems, you will need to install the python3-venv package using the following command :
sudo apt install python3-venv (Ubuntu/Debian-based system)
The full official documentation for
venvcan be found hereThe full official user guide for
venvcan be found hereThe PEP proposal for
venvcan be found here
If you are looking for practical examples, it is recommended to consult the user guide. However, if you are looking for more information about specific details of venv, consulting the full documentation is recommended.
Creating a Virtual Environment with venv
To create a virtual environment called test_env, run the following command:
python3 -m venv test_env (in Unix/MacOS)
python -m venv test_env (in Windows)
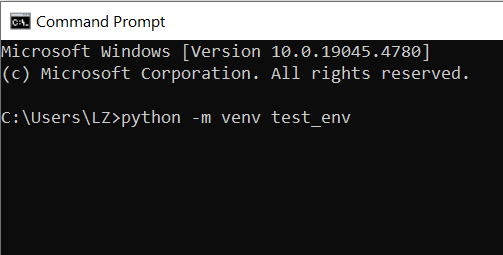
The above code creates a folder test_env with sub-folders Scripts, Lib, Include, and creates a copy of the current Python executable python.exe inside Scipts. It also creates a sub-folder site-packages inside Lib where the packages installed inside the virtual environment will be stored, keeping them isolated from the main Anaconda installation.

If we want to create a virtual environment in a different directory, we can specify the path_to_new_virtual_environment:
python3 -m venv path_to_new_virtual_environment/test_env (in Unix/MacOS)
python -m venv path_to_new_virtual_environment\test_env (in Windows)
Activating a Virtual Environment
Before we can start installing packages in the virtual environment, we must activate it. Doing so will put the virtual environment-specific Python and pip executables in your shell’s PATH.
To activate a virtual environment test_env, run the following command:
source test_env/bin/activate (in Unix/MacOS)
test_env\Scripts\activate (in Windows)
Notice that the environment name (test_env) is listed now before the directory path, with the name enclosed in parentheses.
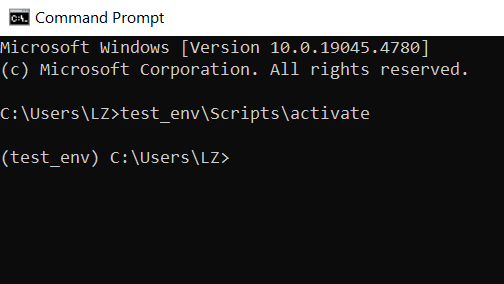
To confirm that the virtual environment has been activated you can check the location of your Python interpreter:
which python or whereis python (in Unix/MacOS)
where python (in Windows)
As long as the environment is active, you’ll be able to import packages installed in the environment.
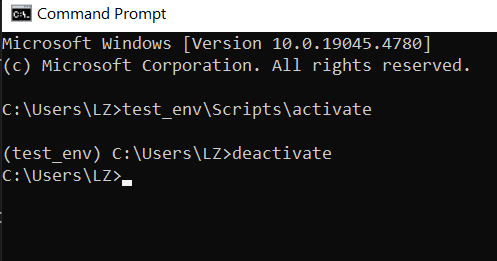
To leave the environment run:
deactivate
Installing and Managing Packages
To install packages, first make sure that the environment is active. Installing packages is done simply with with pip, as you would normally install packages. For example, to install requests (a popular library for making HTTP requests):
python3 -m pip install requests (in Unix/MacOS)
pip install requests (in Windows)
To check the list of all packages installed in the newly created virtual environment, use:
pip list
To check the Python version in the newly created virtual environment, use:
python --version
Similarly, we can generate a text file listing all installed libraries in a virtual environment with:
pip freeze > requirements.txt
This can be convenient, because if other users would like to replicate your virtual environment, instead of installing all libraries one by one, they can just run:
pip install -r requirements.txt
Delete a Virtual Environment
To delete a virtual environment, if the environment is currently active, first deactivate it with deactivate.
Then, to completely remove a virtual environment, just delete the folder test_env either manually, or with:
rm -rf test_env (in Unix/MacOS)
rmdir /s /q test_env (in Windows)
Conda Environment
Conda Env is a self-contained and isolated workspace within the Conda package management system, similar to venv. It allows to create and manage specific environments for different projects or applications, each with its own set of packages and dependencies.
The full official documentation for Conda Env can be found here.
Conda Env is pre-installed with Anaconda.
Creating a Conda Environment
Open the terminal or an Anaconda Prompt. Note that the default environment in Anaconda is
(base)environment. This environment is wherecondaitself is installed.To create a new environment, use:
conda create --name myenv, wheremyenvis the name of the environment.Press
yto proceed.

The above will create a new directory myenv in anaconda3\envs, however without Python interpreter and without any packages.
If we specify the Python version when creating a new environment, this will add python, pip, and several other packages.
conda create --name myenv python=3.13
Alternatively, we can first create an environment, and install Python and other packages afterwards.
Or, we can also duplicate the base environment if we wish to, so that the new environment has all installed packages from the base environment, using:
conda create --name myenv --clone base
Afterward, the two environments are independent, and installing a new package in myenv will not affect the base environment.
Activating a Conda Environment
To activate a Conda Env, type:
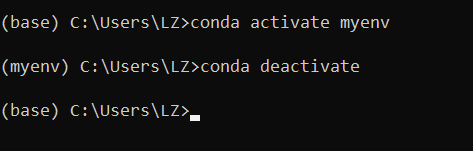
conda activate myenv
Activating a conda environment modifies the path to point to the specific isolated container we created. The command prompt will change to indicate which conda environment we currently are in by prepending (myenv).
To list all installed conda environments, type:
conda env list
In the displayed list of environments, an asterisk * will indicate the currently activated environment.
To deactivate the Conda Env you are in and end the session in the current environment, type:
conda deactivate
This will revert the active environment to base environment.
Manage Packages in a Conda Env
To list all installed packages in a conda environment, type:
conda list
To install a package, for example numpy, type:
conda install numpy
Or, you can use pip install as in:
pip install numpy
The main difference between using conda install and pip install is in the dependency resolution approach.
conda install: conda has a more powerful dependency resolution mechanism. It ensures that all dependencies (both Python and non-Python) are compatible with each other. It often prevents conflicting versions by resolving the entire environment when installing or updating packages.pip install: pip only handles Python dependencies and doesn’t handle system or non-Python libraries. Installing packages with pip can sometimes result in dependency conflicts, especially if different packages require incompatible versions of the same dependency.
We can install multiple packages as in:
conda install numpy pandas matplotlib
To install a package from a specific source, like a URL addres, use:
conda install --channel url_address package_name
To install a package not available in Anaconda’s library, use the following code:
conda install -c conda-forge package_name
It instructs to install a package from a specific channel called conda-forge instead of using only the default channels. Here, -c is short for --channel where a channel is a repository of pre-built conda packages. conda-forge is a large community-maintained channel with more and newer packages than the default conda channel, including many scientific data science tools.
To remove a package, for example numpy, use:
conda remove numpy
To save package list inside a requirements.txt file (similar to pip freeze), use:
conda list --export > requirements.txt
Alternatively, save package list inside an environment.yaml file with:
conda env export > environment.yaml
The files requirements.txt or environment.yaml can afterward be used to create a new environment with installed packages, using:
conda create --name myenv --file requirements.txt
Delete a Conda Environment
To delete a conda environment, use:
conda remove --name myenv --all
BACK TO TOP